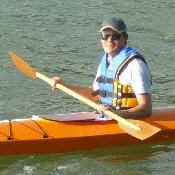
Distractions keep coming along though. On Friday I was invited to crew on the race boat again, an offer I always find hard to turn down. The coming weekend will try to through more diversions no doubt, with my son's sporting commitments and the ever-improving weather making a day spent on a beach somewhere look more and more likely.
Showing posts with label boat building. Show all posts
Showing posts with label boat building. Show all posts
Monday, November 9, 2009
Building momentum
Getting the various hull parts stitched together has provided a bit of impetuous, and I'm trying to maintain the momentum with short bursts of activity. The boat currently sits with all the main seams joined by epoxy fillets and all the cable ties removed. This week I hope to get the glass tape run on the inside seams and the bulkheads cut-out, epoxy coated and fitted.
Monday, October 26, 2009
Coming Together
The Dart 16' design has a round bottom unlike the 14' single kayak, which is a shallow 'V'. To achieve this roundness it has a hog in the bottom, a sort of flat keelson that only runs from about one quarter from the stem to one-quarter to the transom. It caused much consternation because I couldn't decide whether I needed it and how to accommodate it with my previous building experience.
I'd made the hog out of 10mm pine. It is supposed to be half-inch (approx. 12mm) but I couldn't find that size of timber ready cut so decided to go lighter in the interests of keeping overall weight down. To compensate, I covered one side (that is now the bottom) with glass tape to help strengthen the wood and also prevent it from splitting as it is screwed in place under considerable stress.
As always, I should have just trusted my instincts and got on with the job. A tip from an experienced builder in Melbourne, Australia who knows the Dart 16' design clarified the process and as usual, once into the job, although strenuous, it wasn't as bad as I had anticipated. The tip came from the Selway Fisher Designs Builders and Sailors Yahoo Group, a valuable resource. Other such groups exist for many other designers that market to amateur home builders.
It's been a long weekend and I've also managed to make much progress in the landscaping of the garden and I've almost made an adjustable foot rest for the Dart 14' kayak. Photos to follow.
Saturday, October 3, 2009
New Tool
Between boats I took time out to read the Gougeon Brothers on Boat Construction: Wood and West Systems Materials. The Gougeon Brothers are the guys who invented, market and continue to refine West System epoxy resin.
In the book they suggest splitting up a foam roller sleeve and attaching pieces to sticks with a slot cut in the end and using them as resin applicators. Well I tried, but obviously I had the wrong kind of foam roller, so I tried again with pieces of closed-cell foam from the end of a camping mat, and two pieces of 4mm play bound together with tape, and individually bound with plastic parcel tape at the foam end to allow re-use.
It works really well. I'm able to get a far more even spread of resin than when using a chip brush, and the cost is considerably less as well, not to mention the waste. I'm hoping that using better application methods, I'll make a much tidier job and therefore a faster, better build than with my first kayak.
In the book they suggest splitting up a foam roller sleeve and attaching pieces to sticks with a slot cut in the end and using them as resin applicators. Well I tried, but obviously I had the wrong kind of foam roller, so I tried again with pieces of closed-cell foam from the end of a camping mat, and two pieces of 4mm play bound together with tape, and individually bound with plastic parcel tape at the foam end to allow re-use.
It works really well. I'm able to get a far more even spread of resin than when using a chip brush, and the cost is considerably less as well, not to mention the waste. I'm hoping that using better application methods, I'll make a much tidier job and therefore a faster, better build than with my first kayak.

If at first you don't succeed...
...Try, try, try again.
There's no hope of getting in the garden today, the wind is wild and the rain is lashing down. I got the side panels cut out and planed down during the week, so today was a scarfing day. I laid the bottom panels out on offcuts of exterior ply covered with polythene sheet and screwed down the new centre section. I then screwed each of the remaining parts of the original bottom panels to each end. I did the same with the side panels, but in this case there is only one join to make.

I also put the sheer clamps back in the scarfing jig I made. On each side there is a long piece of 2x1" (50x25mm) to act as a straight edge and these and the bottom are again covered in polythene. Down the centre is a strip of mdf about the same thickness as the sheer clamps. I use offcuts of the 4mm ply covered in plastic parcel tape to bridge from one sheer clamp piece to be held over to the centre piece of mdf scrap. A screw near the sheer clamp end provides the clamping pressure but still allows a slight amount of adjustment until I'm happy everything is properly aligned.
There's no hope of getting in the garden today, the wind is wild and the rain is lashing down. I got the side panels cut out and planed down during the week, so today was a scarfing day. I laid the bottom panels out on offcuts of exterior ply covered with polythene sheet and screwed down the new centre section. I then screwed each of the remaining parts of the original bottom panels to each end. I did the same with the side panels, but in this case there is only one join to make.
I also put the sheer clamps back in the scarfing jig I made. On each side there is a long piece of 2x1" (50x25mm) to act as a straight edge and these and the bottom are again covered in polythene. Down the centre is a strip of mdf about the same thickness as the sheer clamps. I use offcuts of the 4mm ply covered in plastic parcel tape to bridge from one sheer clamp piece to be held over to the centre piece of mdf scrap. A screw near the sheer clamp end provides the clamping pressure but still allows a slight amount of adjustment until I'm happy everything is properly aligned.
False Start
A couple of weeks after beginning the second kayak build, I undid all of the work and started again. We had a couple of fair weather days at the weekends so I took some time out to make walkways around the vegetable beds before Bridgit started planting up all of the seedlings. In the meantime, I tried to scarf all the kayak pieces up during the evenings.

I was not happy with the results, though. I was getting air locks in the hardener pump and once batch of epoxy just didn't go off, even after 72 hours. I'd used it to scarf the sheer clamps and also to repair a patch of the glass butt joint on the bottom panels that had air bubbles in it.
I decided to take drastic action. I cut out a section of the bottom panels 9" (225mm) either side of the 'bad' join and put a new 18" (450mm) section of ply in the gap. I also decided that supposed speed methods (applying glass to both sides of the join at one time) was actually sloppy, messy and would use more time in cleaning up and making good later.
I was not happy with the results, though. I was getting air locks in the hardener pump and once batch of epoxy just didn't go off, even after 72 hours. I'd used it to scarf the sheer clamps and also to repair a patch of the glass butt joint on the bottom panels that had air bubbles in it.
I decided to take drastic action. I cut out a section of the bottom panels 9" (225mm) either side of the 'bad' join and put a new 18" (450mm) section of ply in the gap. I also decided that supposed speed methods (applying glass to both sides of the join at one time) was actually sloppy, messy and would use more time in cleaning up and making good later.
Thursday, September 17, 2009
Boat Building Again...
Well, the Mini has been turfed out of the garage and now sits at the top of the drive under a gazebo awaiting a paint job. I've readied the garden beds ready for the new season of vegetables and on Saturday I gave the garage a really good tidy up. In the week I managed to pick up some more epoxy resin and hardener, and tomorrow a work appointment takes me close to Glass Fibre Supplies so I can pick up more tape.
On Sunday I started the build of the Dart 16' two-man kayak by scarfing some pieces of softwood together that will become the hog, kind of a part-length keelson. On Tuesday I got home early and marked out the bottom pieces on a sheet of ply. On Wednesday I cut the pieces out with a jigsaw and this evening I jointed the pieces to make two full length bottom panels. The plan is I will be able to stitch and glue these together, with the hog, over the weekend.
It's great to be building again. I was a little bit cautious at first but after donning the gloves and suit again this evening while spreading the epoxy, I already feel back in the swing of things. I just need to be careful though, there are quite a few design differences between the two kayaks. I must keep checking the plans and reading those instructions.
Hot News: The First Island Bay Dory is Built!
I've just logged into the blog for the first time in a little while to find a message from Rob Buchanan of
Greenport, Long Island, USA. He is the first to inform me that he and his family have built a version of my Island Bay Dory design. Hopefully he'll mail me some pictures soon, and with help from the comment he made on his build, I'll be building an Island Bay Dory with my son in the coming weeks.
Greenport, Long Island, USA. He is the first to inform me that he and his family have built a version of my Island Bay Dory design. Hopefully he'll mail me some pictures soon, and with help from the comment he made on his build, I'll be building an Island Bay Dory with my son in the coming weeks.
Thursday, July 2, 2009
Building on a small scale
While I get some other jobs out of the way (mainly restoring the Mini that is lurking in the background in all the garage shots of the kayak build) I am building on a smaller scale in the house during the dark winter evenings.
I'm trying out the Selway-Fisher Rhum plans at 1:10 scale before trying it for real. The reason for this is I want to change the internal layout, moving bulkheads and fitting permanent side seats, and I want to make sure it all fits. Even small boats are fairly complex 3D shapes an it helps to make sure the visualisation I have in my mind will actually work for real.
Last night I swapped around the bulkheads and made the forward one, the one the mast step and partner are against, full height. This will allow a small foredeck to be fitted, with storage underneath.
I think this will be a really usable little dinghy and I'm quite excited about the build. I just nee to keep the end in site and make sure I don't add so much unnecessary stuff that I can no longer walk the boat down to the ramp. Pictures will follow once I've got the deck fitted on the model.
I'm trying out the Selway-Fisher Rhum plans at 1:10 scale before trying it for real. The reason for this is I want to change the internal layout, moving bulkheads and fitting permanent side seats, and I want to make sure it all fits. Even small boats are fairly complex 3D shapes an it helps to make sure the visualisation I have in my mind will actually work for real.
Last night I swapped around the bulkheads and made the forward one, the one the mast step and partner are against, full height. This will allow a small foredeck to be fitted, with storage underneath.
I think this will be a really usable little dinghy and I'm quite excited about the build. I just nee to keep the end in site and make sure I don't add so much unnecessary stuff that I can no longer walk the boat down to the ramp. Pictures will follow once I've got the deck fitted on the model.
Oh, and I've pretty much decided that the boat will be named Hope, after this amazing instrumental by Rush guitarist Alex Lifeson.
Tuesday, June 9, 2009
The Island Bay Dory
So here it is, my one sheet dory design. I've only made a model of this boat so far, but I hope to make a life-sized version with my son in a couple of month's time. I'll probably use chine logs and glue and screw technique, rather than stitch and tape as documented here in the instructions. I'll document that technique as I build the boat.


If you want to have a go, please read the disclaimer and be realistic about this boat's ability. It's very small and has little load carrying capacity. The flare can be experimented with, more will add stability and buoyancy, but at the expense of freeboard, so its a smooth water only boat. Also, the flare adds rocker, so this boat will probably nod around. Perhaps a small amount of ballast in either end will help overcome this. If you weigh much more than 75Kg then be very careful getting in, I estimate that with that much of a load, the boat will sit around 150mm deep, leaving less than 150mm of freeboard amidships.


I had to post the instructions as JPGs because unfortunately the blogspot software does not allow such pleasant attachment types as PDF or DXF. If you build an Island Bay Dory, real or model, please let me know via the comments box.
If you want to have a go, please read the disclaimer and be realistic about this boat's ability. It's very small and has little load carrying capacity. The flare can be experimented with, more will add stability and buoyancy, but at the expense of freeboard, so its a smooth water only boat. Also, the flare adds rocker, so this boat will probably nod around. Perhaps a small amount of ballast in either end will help overcome this. If you weigh much more than 75Kg then be very careful getting in, I estimate that with that much of a load, the boat will sit around 150mm deep, leaving less than 150mm of freeboard amidships.
I had to post the instructions as JPGs because unfortunately the blogspot software does not allow such pleasant attachment types as PDF or DXF. If you build an Island Bay Dory, real or model, please let me know via the comments box.
Thursday, April 2, 2009
Boats and Boat Names
The kayak doesn't really have a name. I have jokingly referred to it as 'Bullseye' and the double that is to come as 'Double Top' in reference to the design name of Dart and the cult but awful British darts quiz show. I don't think kayaks are boat enough to bare a name though, but that's not the case with subsequent builds.
Currently I have half-hatched plans for a 16' 3-ply sheet proa. I've got a model made that proves the shapes I have designed end up looking like a boat of sorts, I've just the rigging to add. Because I intend to make this boat for very little money, most of the materials will be sourced from large DIY outlets, and so I thought the name 'Big Shed' appropriate. I'd like to have this in Maori, or even better, what ever the native tongue of the Marshall Islands is, but I'll have to be careful to get a good translation and not rely on Internet tools of questionable validity.
Since starting the model, I've been thinking about the difficulties of shunting the real thing (changing the end of the main hull at which the sail is tacked and changing the direction of travel while keeping the outrigger to windward). One solution is to go for a sail with no lower spar and the upper spar hoisted from its mid-point. Such a rig is tipped from one end to the other and is called a Gibbon's Rig. I think it would suit a smaller, single-handed proa and would have to be called the 'Funky Gibbon'. I think it would have a large silhouette of a brachiating gibbon painted on the polytarp sail just for good measure.
These are side projects. I really want to get going on making a dinghy over the winter so I can learn to sail in my own boat. I've decided on another Selway-Fisher design, the Rhum. It will be light enough to trolley down to the beach, can take a small outboard for a spot of fishing and can be rigged with a Gunter rig, similar to the UK Mirror dinghies. It will need a name and I've been thinking along musical themes. I've been looking through song names by my favourite bands to some up with something less in jest than the proa names. Likely candidates are 'Hope', 'Spindrift', 'Red Barchetta' (but only if I paint it red, which is unlikely because its a notoriously difficult colour), 'Working at Perfekt', 'Born of Frustration', 'Anthem', 'Earthshine', 'Beautiful Machine' and 'Pacifier'.
'Pacifier' is likely to be reserved for a bigger boat, should I not like the name it comes with. I like the idea of its relation to Pacific, as in the ocean and the calming affect that messing about in boats tends to have. Rather than building a camp-cruising boat, I'm on the lookout for a good trailer-sailer with sleep-aboard accommodation for 4. This needs a bit of preparation work, firstly I need to learn more about sailing (hence the dinghy build) and secondly, I need to prepare a space on the driveway; more landscaping work.
Currently I have half-hatched plans for a 16' 3-ply sheet proa. I've got a model made that proves the shapes I have designed end up looking like a boat of sorts, I've just the rigging to add. Because I intend to make this boat for very little money, most of the materials will be sourced from large DIY outlets, and so I thought the name 'Big Shed' appropriate. I'd like to have this in Maori, or even better, what ever the native tongue of the Marshall Islands is, but I'll have to be careful to get a good translation and not rely on Internet tools of questionable validity.
Since starting the model, I've been thinking about the difficulties of shunting the real thing (changing the end of the main hull at which the sail is tacked and changing the direction of travel while keeping the outrigger to windward). One solution is to go for a sail with no lower spar and the upper spar hoisted from its mid-point. Such a rig is tipped from one end to the other and is called a Gibbon's Rig. I think it would suit a smaller, single-handed proa and would have to be called the 'Funky Gibbon'. I think it would have a large silhouette of a brachiating gibbon painted on the polytarp sail just for good measure.
These are side projects. I really want to get going on making a dinghy over the winter so I can learn to sail in my own boat. I've decided on another Selway-Fisher design, the Rhum. It will be light enough to trolley down to the beach, can take a small outboard for a spot of fishing and can be rigged with a Gunter rig, similar to the UK Mirror dinghies. It will need a name and I've been thinking along musical themes. I've been looking through song names by my favourite bands to some up with something less in jest than the proa names. Likely candidates are 'Hope', 'Spindrift', 'Red Barchetta' (but only if I paint it red, which is unlikely because its a notoriously difficult colour), 'Working at Perfekt', 'Born of Frustration', 'Anthem', 'Earthshine', 'Beautiful Machine' and 'Pacifier'.
'Pacifier' is likely to be reserved for a bigger boat, should I not like the name it comes with. I like the idea of its relation to Pacific, as in the ocean and the calming affect that messing about in boats tends to have. Rather than building a camp-cruising boat, I'm on the lookout for a good trailer-sailer with sleep-aboard accommodation for 4. This needs a bit of preparation work, firstly I need to learn more about sailing (hence the dinghy build) and secondly, I need to prepare a space on the driveway; more landscaping work.
Thursday, February 19, 2009
Off my Trolley
The kayak trolley has been providing me with lots of headaches, and the kayak with lots of scratches.

The Mk I version was hopeless, so I angled the bunks a bit to provide the Mk II, which also shed its load on the way to the beach. The photo shows the more elaborate Mk III with wide, raised bunks set further forward on the boat to help with balance, and the bungee cords replaced by nylon cam-lock straps. This also failed while taking the kayak down for a quick paddle out to 'VESPER', a schooner moored about 1 km away and which I originally suspected to be a remnant of New Zealand's fleet of trading scows. I know now that it's not a true scow, but need to research a little more to see if there is any link at all to the scows of old. Either way, I ended up carrying the kayak back, along with the trolley and was nearly late for a night out as a result.
The Mk IV trolley is sitting in the garage waiting to be tested, but as I write the rain is torrential and a gale warning is in force, so it will have to wait in the garage a little longer.
My building and boating activities have been somewhat curtailed of late. For the last 4 weeks I've been acting as full time tour guide to my parents, over on a visit from the UK. I did manage to get away yesterday evening however, to take part in a race on board my friend and neighbour's Beale 33' cruiser/racer. Winds were up 15 - 20 knots and with only two of us on board, it was quite exciting. We didn't do well, but that was mainly down to confusion at the start when the skipper accidentally reset his stop watch and so we had only the 1 minute gun to go by, crossing the start over 30 seconds late. I learned a lot during the race though, and also managed to use some of what I've read over the past few months, all good practice for when I build my own boat.
Wednesday, January 21, 2009
Launch
After picking my parents up from the airport, I quickly finished making a trolley for the kayak while they got freshened up. There was a very high tide today at 5:00pm, so at 6:30 there was still plenty of water over the oyster shells for a safe launch after a quick trundle down to the beach.


I went out about 100m, rounded the wharf and paddled into Island Bay (which completely empties on a low tide) and then back again. The boat was very stable but quite a lot of water came over the bow. A spray skirt will be necessary before I cross any rougher water. Also, the paddle could do with being about 200mm longer. I may achieve this by adding an aluminium section to the middle and making it a two-piece paddle.
Sunday, January 18, 2009
Quick Update
The launch date for the kayak is scheduled for 22nd January, this Thursday afternoon.
My parents arrive for a month long visit from the UK, and I'll launch in the afternoon after I've picked them up from the airport.
The kayak is mostly painted, just some black pinstripes and a couple of areas to be touched up. The seat is painted, the paddle is varnished and I've made and painted a toggle for the bow line. Final touches will be some foam rubber mat cable tied to the seat and the forward deck beam (to protect my shins).
I still have top make a trolley to take it the 200m or so to the local boat ramp and beach. I'll probably end up carrying it because I also have to paint and fit foot grips to some bolt-on sidesteps a friend fabricated for the Land Rover a couple of years ago.
Its going to be tight, but a Thursday launch it is.
Monday, December 22, 2008
A Momentus Occasion
No not the launch, not quite.
I finally got some paint on the hull. The sanding of the first load of exterior bog was completed last week, and the second fill on the underside was hard enough to sand at the weekend. I made a start, but was otherwise engaged and so am now a little more behind.
Sunday was spent fixing a couple of things on the Land Rover to get it through the 6-monthly Warrant of Fitness certification that is required in New Zealand. The relatively straight forward job of changing the power steering belt became an epic due to seized bolts. The other job I knew had pitfalls associated with it. I learnt so much in the process of completing the drop arm ball joint fix that I posted my findings here in the hope of my experience being useful to others tackling the same task.
Anyway, last night I finished sanding the second fill and then I started preparing to paint. I washed the bottom down with a warm solution of liquid sugar soap to degrease, remove the dust and any amine blush (a waxy emission from cured epoxy), then rinsed with plenty of water and allowed the boat to dry.
I then applied a coat of Taubmans UnderProof Acrylic Primer Undercoat. This is a water-based acrylic with what smells like an amount of latex added to prevent bleeding through to the top coat. I'm going to be using Taubmans Living Proof Indoor/Outdoor Acrylic Enamel Gloss as the top coat. The reasons to use house paint rather than marine enamel like I tried for the cockpit interior are twofold. Firstly, the marine enamel requires 24 hours between coats, whereas the acrylic enamel requires only an hour or two. Secondly, the smell of the marine enamel was awful, even with the garage door closed it could be detected on walking passed while the boat dried inside.
Obviously there is a Christmas break coming, and we are off on a family camping trip until after New Year's, so the launch will definitely be in 2009. I'm also pretty certain it will be in January of that year.
Wednesday, December 10, 2008
No Longer Without a Paddlle
At the weekend I finally plucked up the courage to cut the flats on the end of the paddle loom. The profiles don't match exactly and one is cut a little too deep where the ply blade is supposed to come up flush to the loom, but its too late now as the parts are stuck together with waterproof polyurethane builder's glue and its all cleaned up ready for varnish. Its not the thing of beauty I had in my mind's eye, but should be good enough to ensure forward motion is maintained. Lets call it the paddle Mk I.
Last night I finished the main fairing compound application to the hull. I'm now out of epoxy pretty much and have developed a loathing for mixing thick fairing compound; it takes longer to mix than it does to spread over the boat.
So I can spend a couple of short evenings painting the seat and vanishing the paddle. Then, at the weekend, its out with the power sander and I can turn all that laboriously mixed and applied fairing compound into dust.
Thursday, December 4, 2008
Coaming Lip
Although I don't have a spray deck, or know how to Eskimo roll, I want to include a lip on the cockpit coaming to hold a spray deck in due course. If I'm to try and cross the Rangitoto Channel in this home built contraption, then I really don't want to get swamped half way across.

To this end, I made a crown of pins all around the coaming and balances a length of 8mm knitted synthetic rope on this, with the odd extra pin tensioning the rope. The rope had first been dipped in straight epoxy resin to soak it.
The pins are now removed and I've started the lengthy process of smoothing (or fairing) the outside of the hull in preparation for painting. There is nothing to add to the kayak now really, just filler and paint. I need to paint the seat and find some closed cell foam to pad it, and I still haven't got round to making a paddle yet.
Thursday, November 27, 2008
Cockpit Coaming
So after the deck went on the last real job of building was to cut out the cockpit hole and line it with a coaming strip. I wasn't looking forward to this part too much because while it is woodwork, its not the orthogonal, easy-to-measure joinery that I'm more accustomed to.


I made a template for the hole by turning one of the plan sheets over and on the plain back marking the centre line, deck beam positions and the run of the cockpit stringers. I joined the tapering lines of the stringers with the curve of the dustbin lid at the aft end, and to an upturned bucket at the forward end. I transferred the curves to the kayak by punching through the paper with an awl. A little adjustment by eye was required to get a more pleasing line on the forward end before the line was followed by the jigsaw.
On the same day I prepared some pieces of ply, 120mm wide and 700mm long, cut across the outer grains of the ply (the way it bends easiest). I laid these pieces on the driveway with an old towel over the top and soaked them with boiling water. A few minutes later I filled the bucket that had acted as a template with sand and the wrapped the pieces (all stacked together) round the bucket and held them in place with a ratchet strap.
Two days later the ply was mostly dry and so I started to lay the curved pieces up on the kayak. I was originally going to make the coaming out of two thicknesses of the 4mm ply on end, wrapped aroung the inside edge of the cockpit cutout. This looked a little clunky though, so after mulling it over for a couple of days, I abandoned the inner layer.
So tonight I trimmed up the pieces with a jigsaw. I marked line parallel to the deck with an offset block then partially flattened out the curved end pieces to trim them. The straight side pieces were then trimmed to fit between the ends from ply with the outer grain running length ways. For the bottom edge, I marked the back of the coaming where it was level with the bottm edge of the cockpit stringers down the sides, and with the bottom of the deck beams on the fore and aft centre line. I faired a curve between the straight sides and the mid point and then cut it out hoping it would look OK when curved back on the boat. This shape has meant the a very deep section to the coaming at the aft edge, which was the intention since there is no real provision for a separate back rest in this kayak.
After a dry fit test I mixed up the epoxy, pre-wet each joint surface and primed out any parts that would be no longer accessible. I then added plenty of microfibres and used this to bong in the coaming. I held everything in place with temporary screws, and on the end joints between the side and end pieces I used broad packers (covered in plastic parcel tape) under the screw to cover the edge and keep the faces flush. The leftover epoxy and any squeeze out was then stuffed back into the gap between the deck and coaming to form a small fillet and improve the bond. Its definitely warming up here now and for the first time I noticed the pot of epoxy getting really hot in my hand as the curing reaction started to happen.
To finish the coaming of I will trim the edges into a fair curve and fit a lip the the upper, outer edge to take a spray skirt. I was going to use some steamed pine for this, but I think the curves are too severe to even bother trying. Instead I'll soak some 10mm rope in epoxy and pin it in place, then fair it in with filler while fairing the rest of the outer hull. And that's really all that is left to do. Tape the deck seam, fair it in along with the other external tapes and then sand and sand and sand, and then paint.
Oh, and there's also the small matter of making a paddle...
Friday, November 21, 2008
Fully Decked
Progress has been slow, its been hard to grab much time in the last week or so.


I have managed to get the deck on the kayak though. I did this through last week, and at the weekend I planed of the excess around the edges and sanded any epoxy that squeezed out of the joint.
On Wednesday I managed to get into the garage for a brief moment to fit the PVC pipe ends that I'm using for hatches. I stuck 3 small, curved face blocks around the underside of each of the holes to increase the gluing surface and held these in place with a small screw each. I then added plenty of epoxy with microfibres to the glass tape the I had previously bonded to the tubes with PVC cement. The fit in the holes was tight enough not to require any tape, pins or clamps. I'll remove the temporary screws, clean up the excess resin and fillet and fill the deck/hatch transition when I'm ready to tape the deck/hull seam.
Finally, here's a shot of the copper pipe that I inserted in the bow to hold the toggle rope.
Monday, November 10, 2008
Improvisation
For me, part of the fun in making my own stuff is in finding alternative uses for everyday items, or alternatively, finding an everyday item to use out of context as a cheaper alternative for the 'proper' part.
The toggle eye I mounted into the bow of the kayak serves two purposes. Firstly, it must reinforce the hull and prevent the pull on the toggle rope from deforming the hull or pulling loose. Secondly, it must separate the hole through the hull from the airtight chamber formed ahead of the forward bulkhead. For this purpose, I employed a short length of 15mm copper pipe. I carefully marked the angles after boring a hole with a 16mm spade bit and cut the ends with a regular hacksaw. I scuffed the surface with 60 grit paper to allow the epoxy to key into the copper. The pipe is encased in a large block of epoxy/microfibre blend, which once cured, I filed back the ends about 1mm each side to be flush with the hull.
Kayak hatch covers are available from lots of outdoor, marine and specialist kayak shops, but the cost in the region of $100 upwards each. I don't need to use the airtight compartments ans storage, I just want to make sure they are dry, and if not (epoxy isn't totally waterproof, although it does take lengthy immersion to get any noticeable absorption) I need to be able to sponge out and air the compartments. To this end, I purchased a couple of 90mm storm water pipe covers. The consist of a short length of 90mm PVC pipe (about 70mm long) with one end open and the other covered by a removable, threaded cap. Again, epoxy wont bond to PVC and I didn't want to rely on simply scuffing the surface of such a large join. I think I read of the vague details of this process, but I made up the details myself.
Firstly I cut a length of glass tape just long enough to wrap round the pipe. I then cut it length ways down the centre. I laid 2 long strips of masking tape, sticky side up, on the workbench and stuck a half-width of glass tape to each, keeping the edges as straight as possible. I then piped a generous line of PVC solvent down the centre of each piece of glass tape. This was then wrapped around a piece of pipe, keeping the 'good' edge of the glass tape parallel with and just below the bottom of the threaded section. The masking tape keeps the glass in contact wit the PVC and allows pressure to be applied so that the solvent is partly absorbed in the glass weave. When I come to mount the pipes in the deck, I'll then add epoxy to the glass tape which will get a good bond with the part of the glass that is not already embedded in the PVC cement. The pipe and caps are grey, but I'll spray the caps with black enamel and any pipe showing above deck will be faired in with an epoxy fillet, primed and painted the same colour as the rest of the boat.
The toggle eye I mounted into the bow of the kayak serves two purposes. Firstly, it must reinforce the hull and prevent the pull on the toggle rope from deforming the hull or pulling loose. Secondly, it must separate the hole through the hull from the airtight chamber formed ahead of the forward bulkhead. For this purpose, I employed a short length of 15mm copper pipe. I carefully marked the angles after boring a hole with a 16mm spade bit and cut the ends with a regular hacksaw. I scuffed the surface with 60 grit paper to allow the epoxy to key into the copper. The pipe is encased in a large block of epoxy/microfibre blend, which once cured, I filed back the ends about 1mm each side to be flush with the hull.
Kayak hatch covers are available from lots of outdoor, marine and specialist kayak shops, but the cost in the region of $100 upwards each. I don't need to use the airtight compartments ans storage, I just want to make sure they are dry, and if not (epoxy isn't totally waterproof, although it does take lengthy immersion to get any noticeable absorption) I need to be able to sponge out and air the compartments. To this end, I purchased a couple of 90mm storm water pipe covers. The consist of a short length of 90mm PVC pipe (about 70mm long) with one end open and the other covered by a removable, threaded cap. Again, epoxy wont bond to PVC and I didn't want to rely on simply scuffing the surface of such a large join. I think I read of the vague details of this process, but I made up the details myself.
Firstly I cut a length of glass tape just long enough to wrap round the pipe. I then cut it length ways down the centre. I laid 2 long strips of masking tape, sticky side up, on the workbench and stuck a half-width of glass tape to each, keeping the edges as straight as possible. I then piped a generous line of PVC solvent down the centre of each piece of glass tape. This was then wrapped around a piece of pipe, keeping the 'good' edge of the glass tape parallel with and just below the bottom of the threaded section. The masking tape keeps the glass in contact wit the PVC and allows pressure to be applied so that the solvent is partly absorbed in the glass weave. When I come to mount the pipes in the deck, I'll then add epoxy to the glass tape which will get a good bond with the part of the glass that is not already embedded in the PVC cement. The pipe and caps are grey, but I'll spray the caps with black enamel and any pipe showing above deck will be faired in with an epoxy fillet, primed and painted the same colour as the rest of the boat.
Tuesday, November 4, 2008
Torture Chamber
The main method of construction on the kayak up to this point has been stitch and tape. Pieces of plywood have been cut to shape and stitched together along there edges with cable ties before a permanent fixing of glass fibre tape and epoxy resin was applied. Another related method is called tortured ply, where compound curves are forced into the plywood. Its relatively easy to get a sheet of ply to bend in one direction at a time, so boats designed for this method of construction have panels shaped as sections of cones or cylinders. But the deck on the kayak is convex across the beam but has a concave sheer, the profile of the top edge of the side panels.
Last night I started putting on the deck on the forward end of the kayak. I screwed an oversize sheet in place at the halfway length of the cockpit. this allowed be to strap the middle section of the sheet roughly and draw an outline to trim the sheet to - still oversize but now by 30-50mm all round.

More screws were placed along the inwales working from the midships forward, and the stresses on the screws got greater as the curve was formed. I used scrap ply packers under each screw to prevent the deck springing back and popping all the screws through. As I approached the forward bulkhead the gap between the inwale and the deck was getting bigger and something needed to be done. I persevered for a while with a couple of ratchet straps holding things down, but it wasn't going to work.

At this point I took of the ratchet straps and then rearranged 3 straps over the top of an old towel that was soaked in hot water. The idea is that the warm and wet environment softens the fibres of the ply and makes it more agreeable to the compound curves being forced upon it. Wooden packers over the inwales concentrated the ratchet straps' force in the right direction while rags protected the deck and hull from the heavy metal hooks and ratchets. While tightening all this lot up, holding the ply with one hand and most of my body and tensioning a strap with the other hand, there was a pinging noise and a sharp pain in my shoulder. The torture victim had fought back.

I don't know what the outcome of all this was, I dared not look in the garage this morning so I'll conduct the post mortem tonight.
Subscribe to:
Posts (Atom)