Sunday, February 1, 2009

More Sea Trials

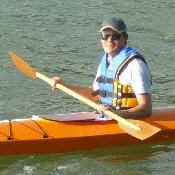
After the launch I went away for a week to the Coromandel.  While there we (me, my parents, partner and son) went on a sailing excursion that I highly recommend to anyone in the area.

The day after I got back I went out for a quiet paddle.  The boat seemed to be moving well so I continued across the entrance of Island Bay and carried on up the west coast of the North Shore until I got to Beach Haven point.  I then made a bold move across the harbour to the boat ramp used to beach Sunderland and Catalina flying boats at the old Hobsonville airfield.  I then tried to cross diagonally back over before hugging the coast again for the last couple of bays, but the boat was catching so much wind I ended up straight-lining the route to the home beach.

I think I'd like to fit a rudder to help steer the boat while I paddle a steady rhythm.  Instead, I was making 3-4 strokes on one side for each stroke on the other to compensate for the wind.  Towards the end of the trip the sea got quite choppy and a bit of water was coming in, so that spray deck is also looking quite essential.  I've now dismantled part of the trolley.  It needs the bunks to be properly aligned with the angles of the hull, and in future I'll secure it to the kayak with some nylon cam-lock straps instead of bungee cords.

Wednesday, January 21, 2009

Launch

After picking my parents up from the airport, I quickly finished making a trolley for the kayak while they got freshened up. There was a very high tide today at 5:00pm, so at 6:30 there was still plenty of water over the oyster shells for a safe launch after a quick trundle down to the beach.


I went out about 100m, rounded the wharf and paddled into Island Bay (which completely empties on a low tide) and then back again. The boat was very stable but quite a lot of water came over the bow. A spray skirt will be necessary before I cross any rougher water. Also, the paddle could do with being about 200mm longer. I may achieve this by adding an aluminium section to the middle and making it a two-piece paddle.

Completion

Here's a couple of pics of the finished product, sitting on the driveway on Wednesday evening awaiting launch the following day.


Sunday, January 18, 2009

Quick Update

The launch date for the kayak is scheduled for 22nd January, this Thursday afternoon.

My parents arrive for a month long visit from the UK, and I'll launch in the afternoon after I've picked them up from the airport.

The kayak is mostly painted, just some black pinstripes and a couple of areas to be touched up.  The seat is painted, the paddle is varnished and I've made and painted a toggle for the bow line.  Final touches will be some foam rubber mat cable tied to the seat and the forward deck beam (to protect my shins).

I still have top make a trolley to take it the 200m or so to the local boat ramp and beach.  I'll probably end up carrying it because I also have to paint and fit foot grips to some bolt-on sidesteps a friend fabricated for the Land Rover a couple of years ago.

Its going to be tight, but a Thursday launch it is.  

Thursday, January 8, 2009

New Year, Same Kayak

Well, that's Christmas and New Year out of the way.

I was really busy getting ready for Christmas, then we went camping for a few nights and got back on New Year's day. I went back to work the following Monday, so tried to spend the weekend doing fun, family stuff rather than sanding.

I finally got around to sanding the first coat of primer and adding a little knifing putty to some of the less well prepared areas (the ones that only show up once its all the same colour). I did a big session of sanding last night and got it close enough. I'm brush painting the top coats so once the minor scratches and edges in the filler are smaller than a brush mark, I don't see the point in spending any more effort getting it better. I will, however, be asking for a random orbital sander for my birthday.


So this evening I put on a second coat of primer. I'll flat it off with a quick rub of 220 grit paper, with a little more attention being payed to a few inevitable runs and drips. It was around 25 degrees Celsius when I was painting in the early evening, and the water based paint was drying as fast as I could brush it out, keeping a wet edge was nigh on impossible.

In the background, between coats, I've also prepped the seat for top-coating, rubbed the paddle down ready for a final coat of varnish, and spray painted some deck hardware in satin black enamel after etch-priming (its all galvanised steel).

Monday, December 22, 2008

A Momentus Occasion

No not the launch, not quite.

I finally got some paint on the hull.  The sanding of the first load of exterior bog was completed last week, and the second fill on the underside was hard enough to sand at the weekend.  I made a start, but was otherwise engaged and so am now a little more behind.

Sunday was spent fixing a couple of things on the Land Rover to get it through the 6-monthly Warrant of Fitness certification that is required in New Zealand.  The relatively straight forward job of changing the power steering belt became an epic due to seized bolts.  The other job I knew had pitfalls associated with it.  I learnt so much in the process of completing the drop arm ball joint fix that I posted my findings here in the hope of my experience being useful to others tackling the same task. 

Anyway, last night I finished sanding the second fill and then I started preparing to paint.  I washed the bottom down with a warm solution of liquid sugar soap to degrease, remove the dust and any amine blush (a waxy emission from cured epoxy), then rinsed with plenty of water and allowed the boat to dry.

I then applied a coat of Taubmans UnderProof Acrylic Primer Undercoat.  This is a water-based acrylic with what smells like an amount of latex added to prevent bleeding through to the top coat.  I'm going to be using Taubmans Living Proof Indoor/Outdoor Acrylic Enamel Gloss as the top coat.  The reasons to use house paint rather than marine enamel like I tried for the cockpit interior are twofold.  Firstly, the marine enamel requires 24 hours between coats, whereas the acrylic enamel requires only an hour or two.  Secondly, the smell of the marine enamel was awful, even with the garage door closed it could be detected on walking passed while the boat dried inside.

Obviously there is a Christmas break coming, and we are off on a family camping trip until after New Year's, so the launch will definitely be in 2009.  I'm also pretty certain it will be in January of that year.

Wednesday, December 10, 2008

No Longer Without a Paddlle

At the weekend I finally plucked up the courage to cut the flats on the end of the paddle loom.  The profiles don't match exactly and one is cut a little too deep where the ply blade is supposed to come up flush to the loom, but its too late now as the parts are stuck together with waterproof polyurethane builder's glue and its all cleaned up ready for varnish.  Its not the thing of beauty I had in my mind's eye, but should be good enough to ensure forward motion is maintained.  Lets call it the paddle Mk I.

Last night I finished the main fairing compound application to the hull.  I'm now out of epoxy pretty much and have developed a loathing for mixing thick fairing compound; it takes longer to mix than it does to spread over the boat.

So I can spend a couple of short evenings painting the seat and vanishing the paddle.  Then, at the weekend, its out with the power sander and I can turn all that laboriously mixed and applied fairing compound into dust.