The previous day we'd been down for a swim and I noticed one of the old boats on that usually sits on a mooring just outside Island Bay was tied up to the wharf. A guy was in a dinghy lashed to the boat, scraping away at the layers of oysters, barnacles and weed that were attached. He told me the story as he worked, his parents had bought the boat after it had finished 4th in the 1977 Auckland - Suva race. When his father became ill his brother took charge of the boat but was too busy to use it or keep up with the maintenance. He had decided to save the vessel and was working hard to restore the 38' ferro-cement cruiser-racer to its former glory and get the boat back in use as a live-aboard that would cruise the Hauraki Gulf. I wished him good luck and merry Christmas.
Thursday, December 24, 2009
Capsize
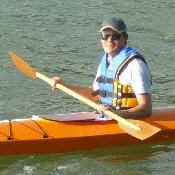
Well I guess it had to happen sooner or later. It a beautiful sunny Christmas day here in Godzone. The whole family went to the beach earlier for a cool off in the sea. I took the kayak and both Bridgit and Sam had their first paddles while I swam alongside and coached them. I was careful to warn them of back paddling too hard as it really seems to unsettle the boat. A little later I had another go myself and as I came back in to the busy beach a child dived in front of me. I franticly back paddled to avoid hitting the kid, and over she went. I popped straight out, and though in standing depth, thought I better practice my re-entry technique. After I quick bail I managed to clamber astride the stern, shuffle forward and swing my legs into the cockpit. It felt very wobbly, but thanks to the calm water I managed to get back in.
Monday, November 9, 2009
Building momentum
Getting the various hull parts stitched together has provided a bit of impetuous, and I'm trying to maintain the momentum with short bursts of activity. The boat currently sits with all the main seams joined by epoxy fillets and all the cable ties removed. This week I hope to get the glass tape run on the inside seams and the bulkheads cut-out, epoxy coated and fitted.
Distractions keep coming along though. On Friday I was invited to crew on the race boat again, an offer I always find hard to turn down. The coming weekend will try to through more diversions no doubt, with my son's sporting commitments and the ever-improving weather making a day spent on a beach somewhere look more and more likely.
Thursday, October 29, 2009
Photographic Evidence of Progress
Here's the Dart 16' kayak bottom panels, joined by hog and cable ties and trussed up with various ropes and ratchet straps to force the roundness into her bottom. It looks brutal, and it is.

Overnight, one of the screws holding the panels to the hog burst out, leaving a nasty kink in the panel. I managed to get some 60 grit paper in through the gap and cleared away as much semi-cured epoxy as possible. I then drilled a 6mm hole through the centre of the affected area and re-packed the gap with fresh resin. Finally a 6mm bolt with a big washer on the back and a spreader of 9mm ply on the top forced the panel back into shape.

I've just finished planing the fair curves to the chine edges of the bottom panels. Next I need to drill all the holes to stitch in the side panels. I've also cut out the bulkheads so the next week should see some big changes. I'm close to finishing the footrest for the 14' Dart kayak, a little work is required for the rail it will be mounted on and then I'll be ready to reveal the design.
Monday, October 26, 2009
Coming Together
The Dart 16' design has a round bottom unlike the 14' single kayak, which is a shallow 'V'. To achieve this roundness it has a hog in the bottom, a sort of flat keelson that only runs from about one quarter from the stem to one-quarter to the transom. It caused much consternation because I couldn't decide whether I needed it and how to accommodate it with my previous building experience.
I'd made the hog out of 10mm pine. It is supposed to be half-inch (approx. 12mm) but I couldn't find that size of timber ready cut so decided to go lighter in the interests of keeping overall weight down. To compensate, I covered one side (that is now the bottom) with glass tape to help strengthen the wood and also prevent it from splitting as it is screwed in place under considerable stress.
As always, I should have just trusted my instincts and got on with the job. A tip from an experienced builder in Melbourne, Australia who knows the Dart 16' design clarified the process and as usual, once into the job, although strenuous, it wasn't as bad as I had anticipated. The tip came from the Selway Fisher Designs Builders and Sailors Yahoo Group, a valuable resource. Other such groups exist for many other designers that market to amateur home builders.
It's been a long weekend and I've also managed to make much progress in the landscaping of the garden and I've almost made an adjustable foot rest for the Dart 14' kayak. Photos to follow.
Saturday, October 3, 2009
New Tool
Between boats I took time out to read the Gougeon Brothers on Boat Construction: Wood and West Systems Materials. The Gougeon Brothers are the guys who invented, market and continue to refine West System epoxy resin.
In the book they suggest splitting up a foam roller sleeve and attaching pieces to sticks with a slot cut in the end and using them as resin applicators. Well I tried, but obviously I had the wrong kind of foam roller, so I tried again with pieces of closed-cell foam from the end of a camping mat, and two pieces of 4mm play bound together with tape, and individually bound with plastic parcel tape at the foam end to allow re-use.
It works really well. I'm able to get a far more even spread of resin than when using a chip brush, and the cost is considerably less as well, not to mention the waste. I'm hoping that using better application methods, I'll make a much tidier job and therefore a faster, better build than with my first kayak.
If at first you don't succeed...
...Try, try, try again.
There's no hope of getting in the garden today, the wind is wild and the rain is lashing down. I got the side panels cut out and planed down during the week, so today was a scarfing day. I laid the bottom panels out on offcuts of exterior ply covered with polythene sheet and screwed down the new centre section. I then screwed each of the remaining parts of the original bottom panels to each end. I did the same with the side panels, but in this case there is only one join to make.

I also put the sheer clamps back in the scarfing jig I made. On each side there is a long piece of 2x1" (50x25mm) to act as a straight edge and these and the bottom are again covered in polythene. Down the centre is a strip of mdf about the same thickness as the sheer clamps. I use offcuts of the 4mm ply covered in plastic parcel tape to bridge from one sheer clamp piece to be held over to the centre piece of mdf scrap. A screw near the sheer clamp end provides the clamping pressure but still allows a slight amount of adjustment until I'm happy everything is properly aligned.
There's no hope of getting in the garden today, the wind is wild and the rain is lashing down. I got the side panels cut out and planed down during the week, so today was a scarfing day. I laid the bottom panels out on offcuts of exterior ply covered with polythene sheet and screwed down the new centre section. I then screwed each of the remaining parts of the original bottom panels to each end. I did the same with the side panels, but in this case there is only one join to make.
I also put the sheer clamps back in the scarfing jig I made. On each side there is a long piece of 2x1" (50x25mm) to act as a straight edge and these and the bottom are again covered in polythene. Down the centre is a strip of mdf about the same thickness as the sheer clamps. I use offcuts of the 4mm ply covered in plastic parcel tape to bridge from one sheer clamp piece to be held over to the centre piece of mdf scrap. A screw near the sheer clamp end provides the clamping pressure but still allows a slight amount of adjustment until I'm happy everything is properly aligned.
False Start
A couple of weeks after beginning the second kayak build, I undid all of the work and started again. We had a couple of fair weather days at the weekends so I took some time out to make walkways around the vegetable beds before Bridgit started planting up all of the seedlings. In the meantime, I tried to scarf all the kayak pieces up during the evenings.

I was not happy with the results, though. I was getting air locks in the hardener pump and once batch of epoxy just didn't go off, even after 72 hours. I'd used it to scarf the sheer clamps and also to repair a patch of the glass butt joint on the bottom panels that had air bubbles in it.
I decided to take drastic action. I cut out a section of the bottom panels 9" (225mm) either side of the 'bad' join and put a new 18" (450mm) section of ply in the gap. I also decided that supposed speed methods (applying glass to both sides of the join at one time) was actually sloppy, messy and would use more time in cleaning up and making good later.
Subscribe to:
Posts (Atom)