The previous day we'd been down for a swim and I noticed one of the old boats on that usually sits on a mooring just outside Island Bay was tied up to the wharf. A guy was in a dinghy lashed to the boat, scraping away at the layers of oysters, barnacles and weed that were attached. He told me the story as he worked, his parents had bought the boat after it had finished 4th in the 1977 Auckland - Suva race. When his father became ill his brother took charge of the boat but was too busy to use it or keep up with the maintenance. He had decided to save the vessel and was working hard to restore the 38' ferro-cement cruiser-racer to its former glory and get the boat back in use as a live-aboard that would cruise the Hauraki Gulf. I wished him good luck and merry Christmas.
Thursday, December 24, 2009
Capsize
Well I guess it had to happen sooner or later. It a beautiful sunny Christmas day here in Godzone. The whole family went to the beach earlier for a cool off in the sea. I took the kayak and both Bridgit and Sam had their first paddles while I swam alongside and coached them. I was careful to warn them of back paddling too hard as it really seems to unsettle the boat. A little later I had another go myself and as I came back in to the busy beach a child dived in front of me. I franticly back paddled to avoid hitting the kid, and over she went. I popped straight out, and though in standing depth, thought I better practice my re-entry technique. After I quick bail I managed to clamber astride the stern, shuffle forward and swing my legs into the cockpit. It felt very wobbly, but thanks to the calm water I managed to get back in.
Monday, November 9, 2009
Building momentum
Getting the various hull parts stitched together has provided a bit of impetuous, and I'm trying to maintain the momentum with short bursts of activity. The boat currently sits with all the main seams joined by epoxy fillets and all the cable ties removed. This week I hope to get the glass tape run on the inside seams and the bulkheads cut-out, epoxy coated and fitted.
Distractions keep coming along though. On Friday I was invited to crew on the race boat again, an offer I always find hard to turn down. The coming weekend will try to through more diversions no doubt, with my son's sporting commitments and the ever-improving weather making a day spent on a beach somewhere look more and more likely.
Thursday, October 29, 2009
Photographic Evidence of Progress
Here's the Dart 16' kayak bottom panels, joined by hog and cable ties and trussed up with various ropes and ratchet straps to force the roundness into her bottom. It looks brutal, and it is.

Overnight, one of the screws holding the panels to the hog burst out, leaving a nasty kink in the panel. I managed to get some 60 grit paper in through the gap and cleared away as much semi-cured epoxy as possible. I then drilled a 6mm hole through the centre of the affected area and re-packed the gap with fresh resin. Finally a 6mm bolt with a big washer on the back and a spreader of 9mm ply on the top forced the panel back into shape.

I've just finished planing the fair curves to the chine edges of the bottom panels. Next I need to drill all the holes to stitch in the side panels. I've also cut out the bulkheads so the next week should see some big changes. I'm close to finishing the footrest for the 14' Dart kayak, a little work is required for the rail it will be mounted on and then I'll be ready to reveal the design.
Monday, October 26, 2009
Coming Together
The Dart 16' design has a round bottom unlike the 14' single kayak, which is a shallow 'V'. To achieve this roundness it has a hog in the bottom, a sort of flat keelson that only runs from about one quarter from the stem to one-quarter to the transom. It caused much consternation because I couldn't decide whether I needed it and how to accommodate it with my previous building experience.
I'd made the hog out of 10mm pine. It is supposed to be half-inch (approx. 12mm) but I couldn't find that size of timber ready cut so decided to go lighter in the interests of keeping overall weight down. To compensate, I covered one side (that is now the bottom) with glass tape to help strengthen the wood and also prevent it from splitting as it is screwed in place under considerable stress.
As always, I should have just trusted my instincts and got on with the job. A tip from an experienced builder in Melbourne, Australia who knows the Dart 16' design clarified the process and as usual, once into the job, although strenuous, it wasn't as bad as I had anticipated. The tip came from the Selway Fisher Designs Builders and Sailors Yahoo Group, a valuable resource. Other such groups exist for many other designers that market to amateur home builders.
It's been a long weekend and I've also managed to make much progress in the landscaping of the garden and I've almost made an adjustable foot rest for the Dart 14' kayak. Photos to follow.
Saturday, October 3, 2009
New Tool
Between boats I took time out to read the Gougeon Brothers on Boat Construction: Wood and West Systems Materials. The Gougeon Brothers are the guys who invented, market and continue to refine West System epoxy resin.
In the book they suggest splitting up a foam roller sleeve and attaching pieces to sticks with a slot cut in the end and using them as resin applicators. Well I tried, but obviously I had the wrong kind of foam roller, so I tried again with pieces of closed-cell foam from the end of a camping mat, and two pieces of 4mm play bound together with tape, and individually bound with plastic parcel tape at the foam end to allow re-use.
It works really well. I'm able to get a far more even spread of resin than when using a chip brush, and the cost is considerably less as well, not to mention the waste. I'm hoping that using better application methods, I'll make a much tidier job and therefore a faster, better build than with my first kayak.
If at first you don't succeed...
...Try, try, try again.
There's no hope of getting in the garden today, the wind is wild and the rain is lashing down. I got the side panels cut out and planed down during the week, so today was a scarfing day. I laid the bottom panels out on offcuts of exterior ply covered with polythene sheet and screwed down the new centre section. I then screwed each of the remaining parts of the original bottom panels to each end. I did the same with the side panels, but in this case there is only one join to make.

I also put the sheer clamps back in the scarfing jig I made. On each side there is a long piece of 2x1" (50x25mm) to act as a straight edge and these and the bottom are again covered in polythene. Down the centre is a strip of mdf about the same thickness as the sheer clamps. I use offcuts of the 4mm ply covered in plastic parcel tape to bridge from one sheer clamp piece to be held over to the centre piece of mdf scrap. A screw near the sheer clamp end provides the clamping pressure but still allows a slight amount of adjustment until I'm happy everything is properly aligned.
There's no hope of getting in the garden today, the wind is wild and the rain is lashing down. I got the side panels cut out and planed down during the week, so today was a scarfing day. I laid the bottom panels out on offcuts of exterior ply covered with polythene sheet and screwed down the new centre section. I then screwed each of the remaining parts of the original bottom panels to each end. I did the same with the side panels, but in this case there is only one join to make.
I also put the sheer clamps back in the scarfing jig I made. On each side there is a long piece of 2x1" (50x25mm) to act as a straight edge and these and the bottom are again covered in polythene. Down the centre is a strip of mdf about the same thickness as the sheer clamps. I use offcuts of the 4mm ply covered in plastic parcel tape to bridge from one sheer clamp piece to be held over to the centre piece of mdf scrap. A screw near the sheer clamp end provides the clamping pressure but still allows a slight amount of adjustment until I'm happy everything is properly aligned.
False Start
A couple of weeks after beginning the second kayak build, I undid all of the work and started again. We had a couple of fair weather days at the weekends so I took some time out to make walkways around the vegetable beds before Bridgit started planting up all of the seedlings. In the meantime, I tried to scarf all the kayak pieces up during the evenings.

I was not happy with the results, though. I was getting air locks in the hardener pump and once batch of epoxy just didn't go off, even after 72 hours. I'd used it to scarf the sheer clamps and also to repair a patch of the glass butt joint on the bottom panels that had air bubbles in it.
I decided to take drastic action. I cut out a section of the bottom panels 9" (225mm) either side of the 'bad' join and put a new 18" (450mm) section of ply in the gap. I also decided that supposed speed methods (applying glass to both sides of the join at one time) was actually sloppy, messy and would use more time in cleaning up and making good later.
Thursday, September 17, 2009
Boat Building Again...
Well, the Mini has been turfed out of the garage and now sits at the top of the drive under a gazebo awaiting a paint job. I've readied the garden beds ready for the new season of vegetables and on Saturday I gave the garage a really good tidy up. In the week I managed to pick up some more epoxy resin and hardener, and tomorrow a work appointment takes me close to Glass Fibre Supplies so I can pick up more tape.
On Sunday I started the build of the Dart 16' two-man kayak by scarfing some pieces of softwood together that will become the hog, kind of a part-length keelson. On Tuesday I got home early and marked out the bottom pieces on a sheet of ply. On Wednesday I cut the pieces out with a jigsaw and this evening I jointed the pieces to make two full length bottom panels. The plan is I will be able to stitch and glue these together, with the hog, over the weekend.
It's great to be building again. I was a little bit cautious at first but after donning the gloves and suit again this evening while spreading the epoxy, I already feel back in the swing of things. I just need to be careful though, there are quite a few design differences between the two kayaks. I must keep checking the plans and reading those instructions.
North Shore Heritage Festival
The local council is throwing a Heritage Festival throughout October. A flyer in the free paper this evening includes details of an event to be hosted by the Devonport Yacht Club from the 4th to the 11th: Boat Designers of the North Shore. The club will be mounting a display of plans, models, photographs and half-hulls.
My only concern is that when I tried to find a link to the event, there was no mention of it in the online material on the council's web site. I'll call the number tomorrow, and if it's on, hopefully I'll be able to post a report on my blog.
UPDATE: I've just spoken to Colin Tubbs at the Devonport Yacht Club, and the exhibition is definitely on, featuring the work of Des Townsend, Bruce Farr and others. The club is located at 25 King Edward Parade in Devonport and the doors will be open daily from 10am to 4pm starting Sunday 4th October until Suntay 10th October; admission is free.
Hot News: The First Island Bay Dory is Built!
I've just logged into the blog for the first time in a little while to find a message from Rob Buchanan of
Greenport, Long Island, USA. He is the first to inform me that he and his family have built a version of my Island Bay Dory design. Hopefully he'll mail me some pictures soon, and with help from the comment he made on his build, I'll be building an Island Bay Dory with my son in the coming weeks.
Greenport, Long Island, USA. He is the first to inform me that he and his family have built a version of my Island Bay Dory design. Hopefully he'll mail me some pictures soon, and with help from the comment he made on his build, I'll be building an Island Bay Dory with my son in the coming weeks.
Thursday, July 2, 2009
Building on a small scale
While I get some other jobs out of the way (mainly restoring the Mini that is lurking in the background in all the garage shots of the kayak build) I am building on a smaller scale in the house during the dark winter evenings.
I'm trying out the Selway-Fisher Rhum plans at 1:10 scale before trying it for real. The reason for this is I want to change the internal layout, moving bulkheads and fitting permanent side seats, and I want to make sure it all fits. Even small boats are fairly complex 3D shapes an it helps to make sure the visualisation I have in my mind will actually work for real.
Last night I swapped around the bulkheads and made the forward one, the one the mast step and partner are against, full height. This will allow a small foredeck to be fitted, with storage underneath.
I think this will be a really usable little dinghy and I'm quite excited about the build. I just nee to keep the end in site and make sure I don't add so much unnecessary stuff that I can no longer walk the boat down to the ramp. Pictures will follow once I've got the deck fitted on the model.
Oh, and I've pretty much decided that the boat will be named Hope, after this amazing instrumental by Rush guitarist Alex Lifeson.
Sunday, June 21, 2009
Blowing away the midwinter blues...
I went round to see a neighbour on Saturday. I took my Rhum dinghy plans and the 1:10 model that I've made of the hull. He has a Sunburst dinghy and I wanted to check dimensions of his side seats to see if a similar layout was possible in the Rhum. It turns out that the slightly stretched version I intend to build will be identical in length and beam to the Sunburst. Not only is this good news for the layout of seats, it also means that I can potentially buy of-the-shelf spars and sails for the Rhum rather than get a custom set made, possible saving a few dollars along the way.
While I was round, Daniel invited me out on his big boat for a race the next day. So Mid-winter's day I was on a 33' racing/cruising yacht reaching at 8.5 knots in a 20 knot southerly blow around Auckland's harbour. There were only 2 boats in our none-spinnaker class, but we won on the line and on handicap. We also beat 3 spinnaker boats over the line, and they had a 5 minute advantage at the start. It was a beautiful clear and crisp day, and putting up with the cold was well worth it for a great day out on the water.
While I was round, Daniel invited me out on his big boat for a race the next day. So Mid-winter's day I was on a 33' racing/cruising yacht reaching at 8.5 knots in a 20 knot southerly blow around Auckland's harbour. There were only 2 boats in our none-spinnaker class, but we won on the line and on handicap. We also beat 3 spinnaker boats over the line, and they had a 5 minute advantage at the start. It was a beautiful clear and crisp day, and putting up with the cold was well worth it for a great day out on the water.
Tuesday, June 9, 2009
The Island Bay Dory
So here it is, my one sheet dory design. I've only made a model of this boat so far, but I hope to make a life-sized version with my son in a couple of month's time. I'll probably use chine logs and glue and screw technique, rather than stitch and tape as documented here in the instructions. I'll document that technique as I build the boat.


If you want to have a go, please read the disclaimer and be realistic about this boat's ability. It's very small and has little load carrying capacity. The flare can be experimented with, more will add stability and buoyancy, but at the expense of freeboard, so its a smooth water only boat. Also, the flare adds rocker, so this boat will probably nod around. Perhaps a small amount of ballast in either end will help overcome this. If you weigh much more than 75Kg then be very careful getting in, I estimate that with that much of a load, the boat will sit around 150mm deep, leaving less than 150mm of freeboard amidships.


I had to post the instructions as JPGs because unfortunately the blogspot software does not allow such pleasant attachment types as PDF or DXF. If you build an Island Bay Dory, real or model, please let me know via the comments box.
If you want to have a go, please read the disclaimer and be realistic about this boat's ability. It's very small and has little load carrying capacity. The flare can be experimented with, more will add stability and buoyancy, but at the expense of freeboard, so its a smooth water only boat. Also, the flare adds rocker, so this boat will probably nod around. Perhaps a small amount of ballast in either end will help overcome this. If you weigh much more than 75Kg then be very careful getting in, I estimate that with that much of a load, the boat will sit around 150mm deep, leaving less than 150mm of freeboard amidships.
I had to post the instructions as JPGs because unfortunately the blogspot software does not allow such pleasant attachment types as PDF or DXF. If you build an Island Bay Dory, real or model, please let me know via the comments box.
Thursday, May 21, 2009
More Projects
I've not got much further with the proa plans, the basics are laid out in a CAD drawing but I need to refine my ideas before I can publish anything there.
Meanwhile, I read a book on DIY projects for the owners of cruising boats and saw a nice little 1-sheet dory style dinghy. I like the idea of trying something like this with my son, since he is light enough to float in it. I wasn't too keen on the shape of the boat in the book, but I liked the concept. I've worked on it some more and my second attempt came out nearly right. A little more refining and I'll have the plans available for the plywood part. It's not a true one-sheet boat because it will also require some wood for the seats and gunwales. And in fact to avoid exposing my lad to epoxy, I'll probably try making it with gluing batons planed to the right angles, polyeurathane glue and stainless screws.
Finally, I've also sent off to Selway-Fisher for plans to build the Rhum 11'6" dinghy in which I hope to learn to sail.
Tuesday, April 14, 2009
Proa Model
OK, so here's the model proa I made. Its made in 1:10 scale, the real boat would be 4.8m long and 2.7m wide overall.


Not so amazing in itself, but there are a couple of things I was trying to prove. Firstly, I wanted the hull form and rig to closely mimic the White Heron, a Kiribati sailing canoe that is on display a the New Zealand National Maritime Museum in Auckland. Secondly, I wanted the design to be a modern translation, in plywood, with very simple shapes to minimize the need for complex lofting and also to use the fewest possible number of sheets.
I have a CAD drawing of the panels required to make the waka or main hull. It is possible to fit them all on 3 standard 1200x2400mm sheets of plywood, and I think 6mm ply would be sufficient for the job. The outrigger (ama) could be fashioned from a 100mm square fence post, 2400mm long by sawing crude point and then refining the shape with a coarse sanding wheel on an angle grinder. The spars could be akas (beams holding the ama) could be bamboo and the same possibly for the mast, but the spars I'm not sure on at the moment. To scale they are 4.5m long, sop probably scarfed and laminated softwood is looking the most likley. Softwood stock would also be required for gunwales, gluing battens and the mast and spar steps. The sail would be poly tarp.
Now the only problem is, I can't attach the PDF file I created from the CAD drawing, its a limitation of blogspot that I can't post attachments that aren't photo or video file types. This means I'll have to add more dimensional information before publishing them as jpegs, to allow others to lay out the panels. The great thing is, the shapes are so simple that I could almost manage a written description of each piece instead.
I'm not sure I'll ever build the real thing though. I've gone through the shunting process in miniature and its easy to imagine a disaster trying it for real at sea. I think the next step will be to develop a smaller version of the hull, 4 metres length at most, and equip it with a tipping Gibbon's rig.
Thursday, April 2, 2009
Boats and Boat Names
The kayak doesn't really have a name. I have jokingly referred to it as 'Bullseye' and the double that is to come as 'Double Top' in reference to the design name of Dart and the cult but awful British darts quiz show. I don't think kayaks are boat enough to bare a name though, but that's not the case with subsequent builds.
Currently I have half-hatched plans for a 16' 3-ply sheet proa. I've got a model made that proves the shapes I have designed end up looking like a boat of sorts, I've just the rigging to add. Because I intend to make this boat for very little money, most of the materials will be sourced from large DIY outlets, and so I thought the name 'Big Shed' appropriate. I'd like to have this in Maori, or even better, what ever the native tongue of the Marshall Islands is, but I'll have to be careful to get a good translation and not rely on Internet tools of questionable validity.
Since starting the model, I've been thinking about the difficulties of shunting the real thing (changing the end of the main hull at which the sail is tacked and changing the direction of travel while keeping the outrigger to windward). One solution is to go for a sail with no lower spar and the upper spar hoisted from its mid-point. Such a rig is tipped from one end to the other and is called a Gibbon's Rig. I think it would suit a smaller, single-handed proa and would have to be called the 'Funky Gibbon'. I think it would have a large silhouette of a brachiating gibbon painted on the polytarp sail just for good measure.
These are side projects. I really want to get going on making a dinghy over the winter so I can learn to sail in my own boat. I've decided on another Selway-Fisher design, the Rhum. It will be light enough to trolley down to the beach, can take a small outboard for a spot of fishing and can be rigged with a Gunter rig, similar to the UK Mirror dinghies. It will need a name and I've been thinking along musical themes. I've been looking through song names by my favourite bands to some up with something less in jest than the proa names. Likely candidates are 'Hope', 'Spindrift', 'Red Barchetta' (but only if I paint it red, which is unlikely because its a notoriously difficult colour), 'Working at Perfekt', 'Born of Frustration', 'Anthem', 'Earthshine', 'Beautiful Machine' and 'Pacifier'.
'Pacifier' is likely to be reserved for a bigger boat, should I not like the name it comes with. I like the idea of its relation to Pacific, as in the ocean and the calming affect that messing about in boats tends to have. Rather than building a camp-cruising boat, I'm on the lookout for a good trailer-sailer with sleep-aboard accommodation for 4. This needs a bit of preparation work, firstly I need to learn more about sailing (hence the dinghy build) and secondly, I need to prepare a space on the driveway; more landscaping work.
Wednesday, March 18, 2009
VESPER
While out on the water the other day I couldn’t resist the temptation to paddle over to the flat bottomed schooner ‘VESPER’ that caught my eye on my first trip of any length in my kayak.

I’ve determined enough to categorically state that she is not the scow that I first suspected. On my last visit to her mooring I took photos but made no attempt to gauge her dimensions. On this latest trip I manoeuvred my Dart carefully in the strong outgoing tidal current and judged her to be only 2.5 Darts long and not quite a Dart wide. In more conventional units, that’s a waterline length of around 35 feet and a beam of around 12 feet. This is roughly half the recorded size of the scow ‘VESPER’, and even allowing for the somewhat rudimentary means of measurement, I don’t think I could get it that wrong.

I’ve learnt a little of the maritime history of the region over the last few months though, mostly by the power of the internet. The story begins back in the 1860s when the first scows appeared around the Auckland coast. These were flat bottomed boats with square ends and lee-boards fitted to allow them to be driven by a fore and aft topsail gaff schooner rig. Typical dimensions of the early boats were 60 feet in length with a beam of 20 feet. The design and construction is thought to be directly from scows of the USA and Canada, there use being initiated by immigrants from those countries.

The need for heavy cargo boats of shoal draft comes from Auckland’s location. Situated on an isthmus the city is squeezed between the Manukau Harbour to the south, which opens into the Tasman Sea on the West coast, and the Waitemata Harbour to the north, which opens into the Hauraki Gulf to the East. As the population of the region grew and more of the land was settled, so resources such as timber for building and livestock to feed the city folk needed to be sourced in larger quantities and from further afield. Scows weren’t used exclusively in the Auckland region by any means, but for a while, they were the lifeline for this burgeoning community.
Soon the trading scows were refined to include a pointed bow and a centre board or boards instead of the lee-boards. This improved the sea worthiness and speed of the vessels, as well as making it easier to load cargo. Typically the vessels were sailed into a harbour and almost beached at low tide to be loaded with all manner of livestock before floating of on the incoming tide. Pens on the decks held the beasts, and sand was spread to help them keep their feet during a rough passage. For the timber carrying vessels, huge kauri and totara logs would be rolled onto the deck and lashed to either side of the masts.
Whether it was racing that led to the refinements in hull form, or that because of the refinements racing seemed like a good idea has probably been lost in the mists of time, but race they did. The serious racing sailor’s of the day poured scourn on the idea that these barges should be given their own race on the programme for the Auckland Anniversary Regatta, but by 1884 the class was well established and in that year was won by ‘VIXEN’, a 69’3” long, 18’8” wide scow built by Charles Bailey Snr. of Auckland for Captain Biddick as a cattle scow in 1883.
 The sailing scow 'VESPER', taken around the turn of the 19th to 20th Century
Captain Biddick commissioned another vessel of similar design, this time 76’8” by 21’8” and built by Bailey and Lowe in 1902. She was called ‘VESPER’. The picture from Anthony Flude’s site on Auckland history show a far more refined shape than the smaller ‘TED ASHBY’, a reproduction of an earlier design with the more modest dimensions of 57’ by 18’. It was the refined lines in this picture that gave me hope that the ‘VESPER’ I had seen was the same boat, but the dimensions rule that out. Incidentally, the scow VESPER’ was last recorded as being used as a mussel barge in the Marlborough Sounds in 1992 according to Mike Subritzky’s book ‘Subritzky Shipping’.
 The 'TED ASHBY' at the National Maritime Museum, Auckland
So I still don’t know the origins of the flat bottomed, gaff rigged schooner ‘VESPER’ that is moored in the Upper Waitemata Harbour. I’ll send my photos off to the National Maritime Museum and see if model maker and scow enthusiast I was talking to has any clues...
References
Papers Past - The Auckland Star, 29th January 1884
The Days of the Sailing Scows by Anthony G. Flude
NZ Scows from Mike Subritzky's 'Subritzky Shipping' compiled by Koeke Junction
Tuesday, March 17, 2009
Lots of projects, but still got time for a paddle
I've so many little projects on at the moment, and none of them complete.
I'm doing a little landscaping along the back fence, but that's bogged down with digging up a stump that's in the way. I've been playing around with a few proa models, trying to figure out a way of making a replica of the 'WHITE HERON' using no more than 3 sheets of 6mm exterior ply, some softwood and a poly tarp. While I was studying my photos of the original at the National Maritime Museum, I noticed that the length given on the information plaque of 24'4" seemed way to long. I paced it at around 14', and 8 foot overall beam, which is as the plaque stated. I e-mailed the museum, and sure enough, it was a typographical error, the real length is 14'4". Anyway, the model is coming along but I think I may need to change a couple of features. I've also been reading up about scows to determine the origin of a vessel I saw moored up in the harbour while I was out or a paddle.
The Mark IV trolley was never tested. One project I did complete was adding a wider axle and rubber tyred wheels, while reducing the overall height in a quest for stability. I'm pleased to report that the trip to and from the ramp with the Mark V trolley was event free, everything working as it should. I went for a 6.5km paddle, nosing around the various boats and ships moored between Island Bay and the entrance to Hellyers Creek. The water was flat and win d was negligible, so it was nice to paddle in relatively straight lines, although a very strong outgoing tidal flow gave m some challenges.
From this last trip out, I think I'll make a rudder the very lowest priority of things to fix. The two main things I want to fix is the paddle (its too short and the blades a little too flexible) and the making of a spray skirt. The first attempt at the latter failed due to my hopeless skills with a sewing machine, so I have a new plan that will be less stitch and more glue.
Thursday, February 19, 2009
Off my Trolley
The kayak trolley has been providing me with lots of headaches, and the kayak with lots of scratches.

The Mk I version was hopeless, so I angled the bunks a bit to provide the Mk II, which also shed its load on the way to the beach. The photo shows the more elaborate Mk III with wide, raised bunks set further forward on the boat to help with balance, and the bungee cords replaced by nylon cam-lock straps. This also failed while taking the kayak down for a quick paddle out to 'VESPER', a schooner moored about 1 km away and which I originally suspected to be a remnant of New Zealand's fleet of trading scows. I know now that it's not a true scow, but need to research a little more to see if there is any link at all to the scows of old. Either way, I ended up carrying the kayak back, along with the trolley and was nearly late for a night out as a result.
The Mk IV trolley is sitting in the garage waiting to be tested, but as I write the rain is torrential and a gale warning is in force, so it will have to wait in the garage a little longer.
My building and boating activities have been somewhat curtailed of late. For the last 4 weeks I've been acting as full time tour guide to my parents, over on a visit from the UK. I did manage to get away yesterday evening however, to take part in a race on board my friend and neighbour's Beale 33' cruiser/racer. Winds were up 15 - 20 knots and with only two of us on board, it was quite exciting. We didn't do well, but that was mainly down to confusion at the start when the skipper accidentally reset his stop watch and so we had only the 1 minute gun to go by, crossing the start over 30 seconds late. I learned a lot during the race though, and also managed to use some of what I've read over the past few months, all good practice for when I build my own boat.
Wednesday, February 4, 2009
Saltier by the Day
I think I'm turning into an antipodean Gavin Atkin. For those few of you who read these pages and don't know who Gavin is, then I suggest you get over to intheboatshed.net immediately.
I must admit that I like the idea of not only building my own boat, but also designing its lines. And through reading Gavin's blog, I've developed a respect and increasing interest in older boats and ships.
While I was paddling round the upper Waitemata Harbour at the weekend, I was fascinated by the many boats I saw moored up along the way. One of these I suspected to be a converted sailing scow, a commercial vessel from 100 years ago, essential in the development of Auckland as a city.
Today I went with my parents to the National Maritime Museum. We took a look at the racing boats and sponsor's yachts and launches, here in town for the Louis Vuitton Pacific Series and then headed for the museum. They wanted to potter around and enjoy the waterfront, but I was on a mission.
I took lots of notes and photographs of the exhibits in the Hawaiki hall, especially of this Kiribati canoe. It is a proa, that is it does not tack but shunts, the outrigger stays to windward and the lower point of the sail is moved to the other end of the boat and it 'reverses'. This is in fact a western prejudiced way to think of it, for in this type of boat the axis of symmetry is shifted 90 degrees and there is no front or back, but a windward and leeward. Anyway, I want to build one so I thought I'd examine an original rather than use plans of a western interpretation.

I also wanted to check out the Ted Ashby, one of the few remaining sailing scows still working for a living, albeit as a harbour cruise distraction for the paying visitors to the museum.

Between the Pacific craft in the Hawaiki hall and the quay where the Ted Ashby and other vessels are moored, I came across this beautiful rowing boat. It spent its working life in the Auckland Islands, 300 km south of the main New Zealand land masses. It appears to never have been used though. It was stationed on the islands along with cashes of food and clothes in case of ship wrecks.

I intend to deliver more on each of these vessels. I'll digest my notes and try and define the critical forms, structures and mechanisms of the sailing canoe, determine whether the boat I sighted was indeed an original scow (with the help of a volunteer and model maker at the museum) and publish more photographs and details of the boat and the castaway station on the Auckland Islands.
Sunday, February 1, 2009
More Sea Trials
After the launch I went away for a week to the Coromandel. While there we (me, my parents, partner and son) went on a sailing excursion that I highly recommend to anyone in the area.
The day after I got back I went out for a quiet paddle. The boat seemed to be moving well so I continued across the entrance of Island Bay and carried on up the west coast of the North Shore until I got to Beach Haven point. I then made a bold move across the harbour to the boat ramp used to beach Sunderland and Catalina flying boats at the old Hobsonville airfield. I then tried to cross diagonally back over before hugging the coast again for the last couple of bays, but the boat was catching so much wind I ended up straight-lining the route to the home beach.
I think I'd like to fit a rudder to help steer the boat while I paddle a steady rhythm. Instead, I was making 3-4 strokes on one side for each stroke on the other to compensate for the wind. Towards the end of the trip the sea got quite choppy and a bit of water was coming in, so that spray deck is also looking quite essential. I've now dismantled part of the trolley. It needs the bunks to be properly aligned with the angles of the hull, and in future I'll secure it to the kayak with some nylon cam-lock straps instead of bungee cords.
Wednesday, January 21, 2009
Launch
After picking my parents up from the airport, I quickly finished making a trolley for the kayak while they got freshened up. There was a very high tide today at 5:00pm, so at 6:30 there was still plenty of water over the oyster shells for a safe launch after a quick trundle down to the beach.


I went out about 100m, rounded the wharf and paddled into Island Bay (which completely empties on a low tide) and then back again. The boat was very stable but quite a lot of water came over the bow. A spray skirt will be necessary before I cross any rougher water. Also, the paddle could do with being about 200mm longer. I may achieve this by adding an aluminium section to the middle and making it a two-piece paddle.
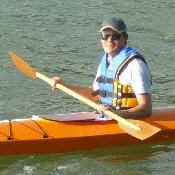
Completion
Here's a couple of pics of the finished product, sitting on the driveway on Wednesday evening awaiting launch the following day.


Sunday, January 18, 2009
Quick Update
The launch date for the kayak is scheduled for 22nd January, this Thursday afternoon.
My parents arrive for a month long visit from the UK, and I'll launch in the afternoon after I've picked them up from the airport.
The kayak is mostly painted, just some black pinstripes and a couple of areas to be touched up. The seat is painted, the paddle is varnished and I've made and painted a toggle for the bow line. Final touches will be some foam rubber mat cable tied to the seat and the forward deck beam (to protect my shins).
I still have top make a trolley to take it the 200m or so to the local boat ramp and beach. I'll probably end up carrying it because I also have to paint and fit foot grips to some bolt-on sidesteps a friend fabricated for the Land Rover a couple of years ago.
Its going to be tight, but a Thursday launch it is.
Thursday, January 8, 2009
New Year, Same Kayak
Well, that's Christmas and New Year out of the way.
I was really busy getting ready for Christmas, then we went camping for a few nights and got back on New Year's day. I went back to work the following Monday, so tried to spend the weekend doing fun, family stuff rather than sanding.
I finally got around to sanding the first coat of primer and adding a little knifing putty to some of the less well prepared areas (the ones that only show up once its all the same colour). I did a big session of sanding last night and got it close enough. I'm brush painting the top coats so once the minor scratches and edges in the filler are smaller than a brush mark, I don't see the point in spending any more effort getting it better. I will, however, be asking for a random orbital sander for my birthday.

So this evening I put on a second coat of primer. I'll flat it off with a quick rub of 220 grit paper, with a little more attention being payed to a few inevitable runs and drips. It was around 25 degrees Celsius when I was painting in the early evening, and the water based paint was drying as fast as I could brush it out, keeping a wet edge was nigh on impossible.
In the background, between coats, I've also prepped the seat for top-coating, rubbed the paddle down ready for a final coat of varnish, and spray painted some deck hardware in satin black enamel after etch-priming (its all galvanised steel).
Subscribe to:
Posts (Atom)